Your home is likely your biggest investment, and protecting it shouldn't require a degree in technology. Yet when you start researching how to choose a home security system, you're met with dozens of...
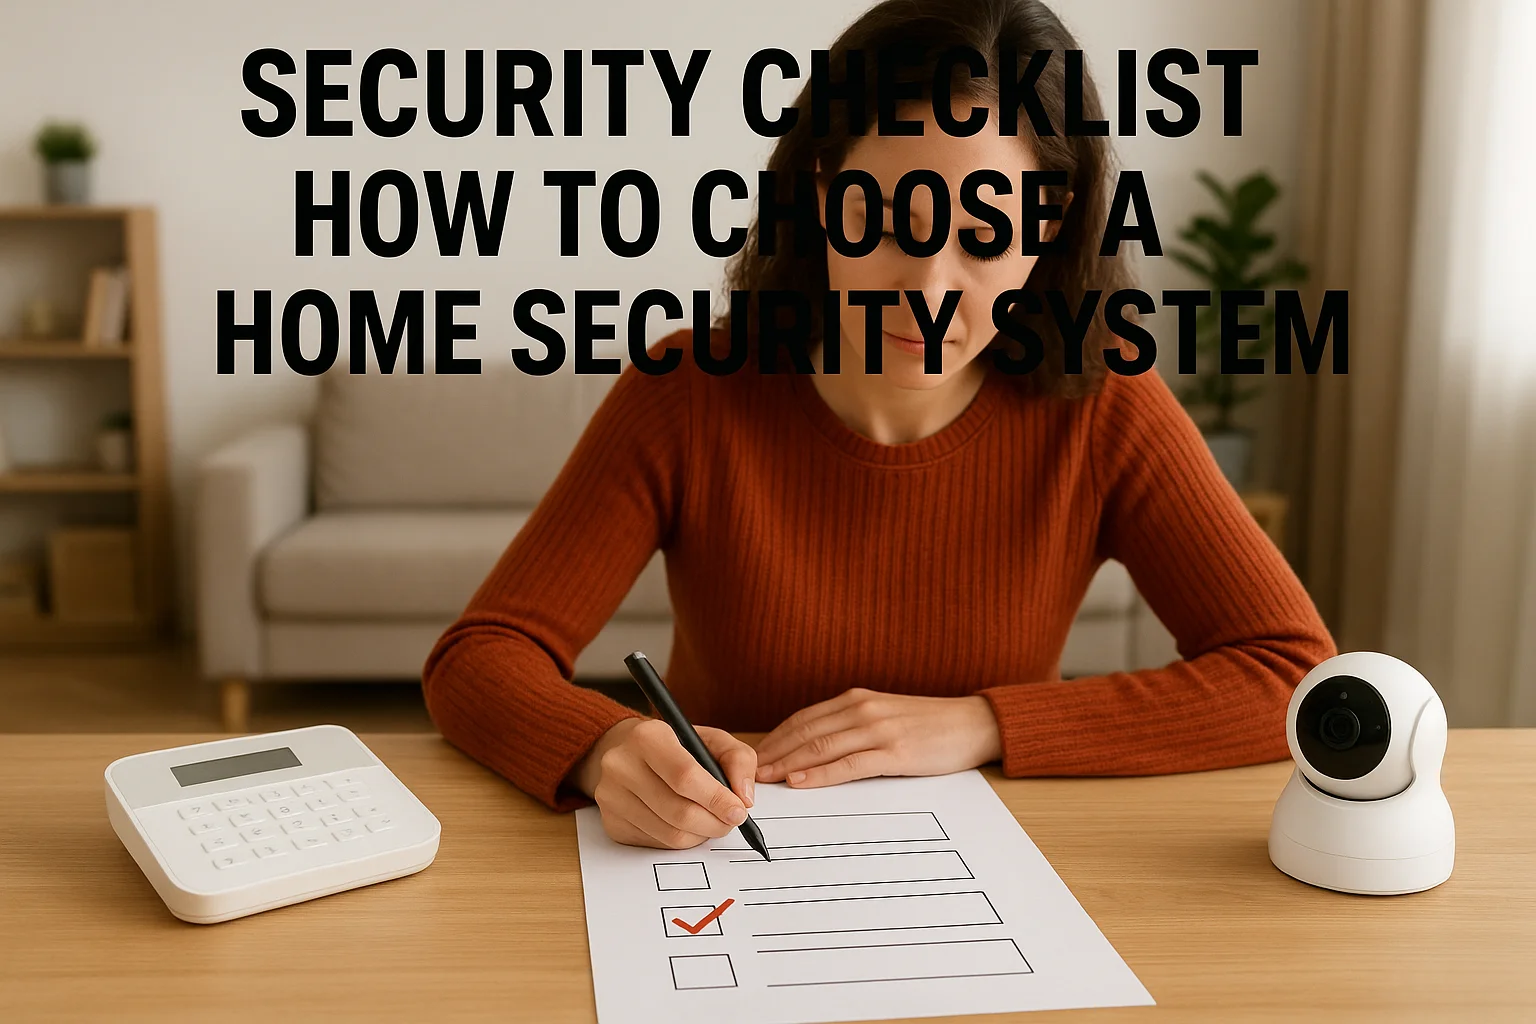
Security Checklist: How To Choose A Home Security System
Your home is likely your biggest investment, and protecting it shouldn't require a degree in technology. Yet when you start researching how to choose a home security system, you're met with dozens of providers, confusing equipment bundles, and conflicting advice about what actually keeps your family safe.
The reality is there's no universal "best" security system. What works for a downtown Boise condo looks completely different from what a family needs on a sprawling Eagle property. Professional monitoring vs. self-monitoring, wired vs. wireless, smart home integration vs. standalone, each decision shapes your daily experience and long-term costs in ways that aren't always obvious upfront.
At Treasure Valley Solutions, we've spent over a decade designing and installing custom security systems for homes and businesses across Idaho. This guide draws from that hands-on experience to give you a clear framework for evaluating your options. We'll walk through the key factors, from equipment features to installation types to monitoring services, so you can make a confident decision that fits your property, budget, and lifestyle.
What "right" means for your home or business
The "right" security system doesn't mean the most expensive cameras or the longest feature list. It means a setup that matches your actual vulnerabilities, fits how you live or operate, and scales with your needs over time. A single-story ranch in Nampa with wide-open sightlines requires different coverage than a two-story home in Eagle with multiple entry points and thick landscaping.
Match security to your property layout
Your physical space dictates what equipment you need and where it goes. A corner lot property with street exposure on two sides needs perimeter coverage that a mid-block home doesn't. Apartments and condos face different challenges than standalone houses, you're protecting fewer entry points but dealing with shared walls and hallways where you can't control access.
Walk through your property and map out vulnerable zones. Ground-floor windows, sliding doors, garage entries, basement access points, and rear gates all deserve attention. Commercial properties add complexity with multiple public entrances, loading docks, and after-hours access needs. Your security plan should address each of these areas with the appropriate sensors, cameras, or access controls.
Pay attention to physical barriers that already exist. Solid fencing, well-lit walkways, and clear sightlines from the street all reduce risk naturally. Your security system should complement these features, not try to compensate for fundamental design problems. If you have a dark, heavily wooded backyard with no lighting, adding cameras alone won't solve the problem.
Factor in your daily routines
Security systems live in your day-to-day reality. If you have kids coming home from school before you get off work, you need a system they can easily disarm without creating false alarms. If you travel frequently for business, remote monitoring and control becomes essential, not optional.
The best security system is one you'll actually use consistently, and that means it has to fit seamlessly into your routine without adding friction.
Think about who needs access to your property. Do you have regular service providers like housekeepers, landscapers, or dog walkers? Smart locks with temporary access codes solve this problem without handing out physical keys. Property managers dealing with tenant turnover need systems that let them easily add and remove access without rekeying locks or redistributing fobs.
Your schedule matters too. If you work from home, you might want motion sensors that arm only certain zones during the day. Families with pets need sensors that can distinguish between a 70-pound dog and an actual intruder. Commercial spaces with varying operating hours need flexible scheduling that adjusts coverage based on when employees are present.
Consider growth and future needs
Your security needs will change. That starter home might become a rental property in five years. Your business might expand into a second location. Choosing modular, expandable systems now saves you from having to rip everything out later.
Look for platforms that support adding cameras, sensors, and smart home devices incrementally. Wireless systems generally offer more flexibility than hardwired setups, though professional installations often combine both for the best balance of reliability and adaptability. You want a system that can scale from basic door and window sensors to full video surveillance and automation without starting from scratch.
Budget for growth when learning how to choose a home security system. Starting with professional monitoring and quality cameras at key entry points beats installing cheap equipment everywhere. You can always add motion sensors and glass break detectors later, but replacing inferior cameras gets expensive fast. Building on a solid foundation costs less than replacing a system that can't grow with you.
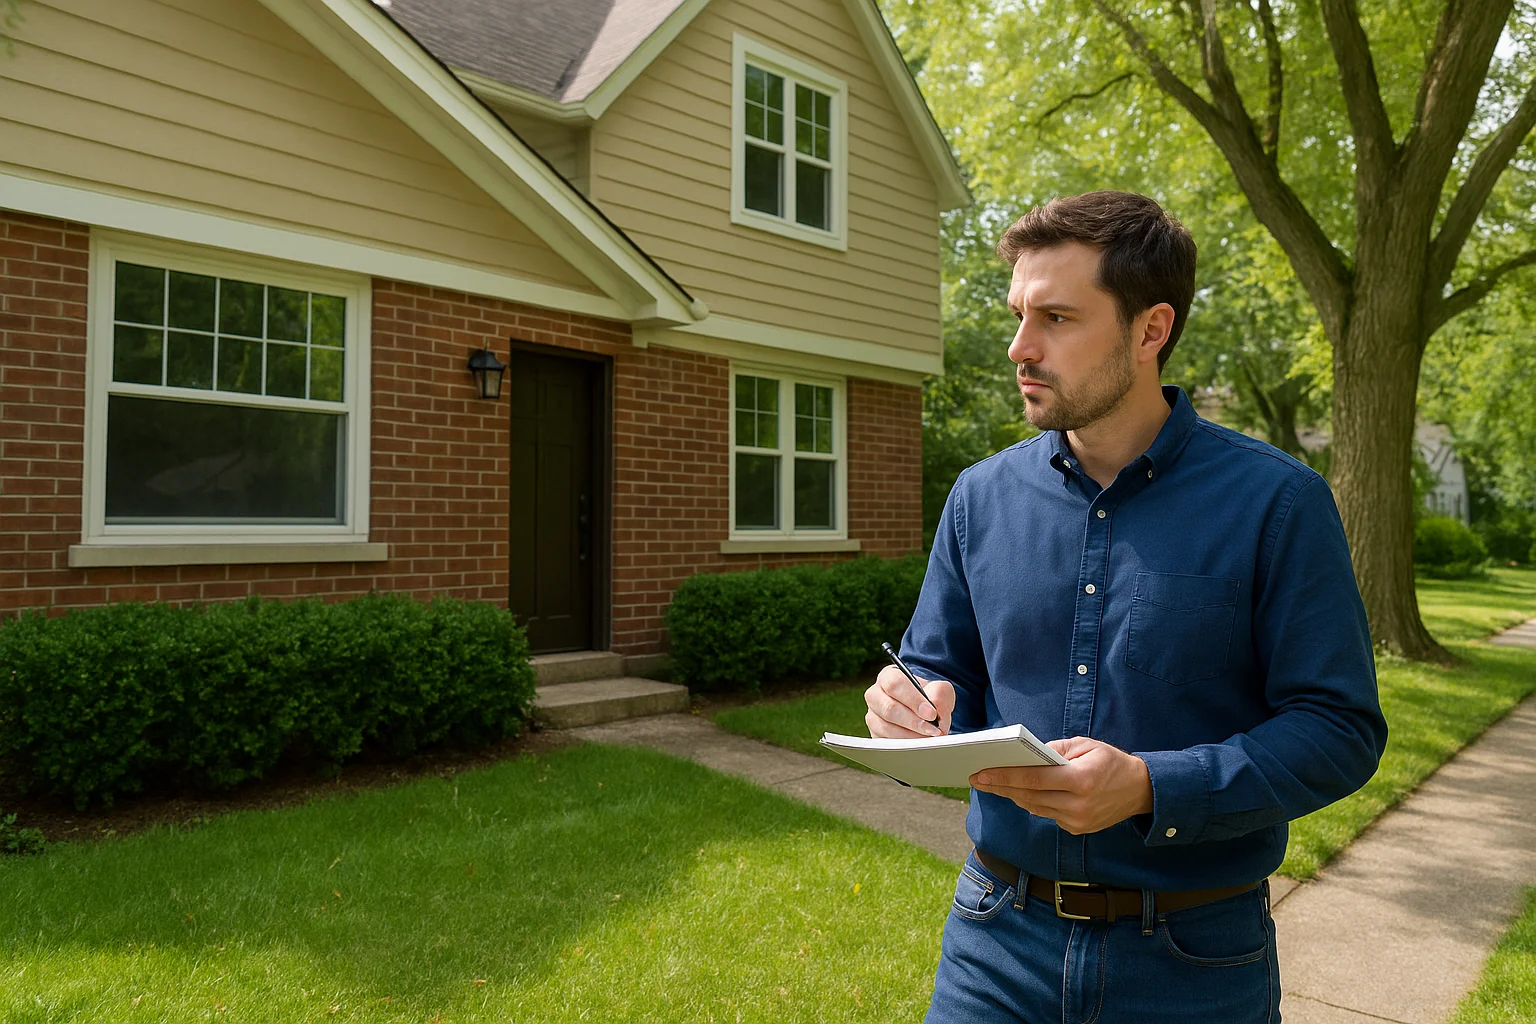
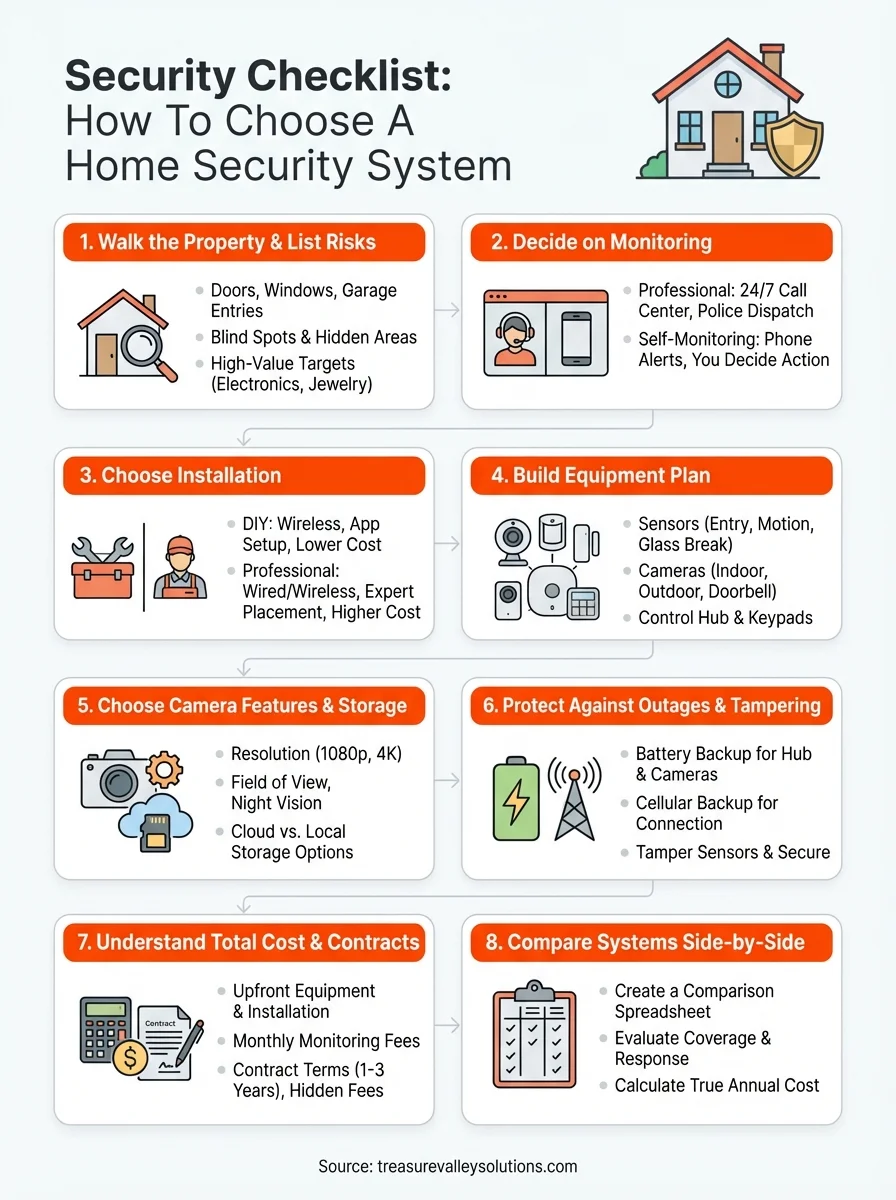
Step 1. Walk the property and list risks
The first step when learning how to choose a home security system is understanding what you're actually protecting. Grab a notepad or your phone and physically walk every exterior wall, every floor level, and every access point. This isn't about paranoia; it's about creating an accurate map of vulnerable spots that criminals exploit. Most break-ins happen through unlocked doors and easily accessed windows, which means your security plan needs to address the obvious problems before worrying about sophisticated threats.
Document every entry point
Start with doors. Count your front door, back door, side doors, garage entries, and basement access points. Check each one for quality. A flimsy hollow-core door with a basic knob lock represents a bigger risk than a solid wood door with a deadbolt. Note which doors you use daily and which sit locked most of the time.
Move to windows next. Ground-floor windows are the priority, but don't ignore second-story access points near trees, porches, or roof lines. A determined intruder can climb, and corner properties often have mature trees that provide easy access to upper levels. Mark windows that don't lock properly or have damaged frames. Sliding glass doors deserve special attention since the locking mechanisms often fail or get bypassed easily.
Identify blind spots and hidden areas
Walk your property's perimeter and note spots where someone could approach without being seen from the street or neighboring properties. Dense shrubs near windows, tall fences that block sightlines, and unlit areas around entry points all create hiding opportunities. These zones need either physical changes like trimming vegetation and adding lighting, or security coverage through cameras and motion sensors.
The goal isn't to eliminate every hiding spot, but to make sure your security system covers the ones you can't physically change through landscaping or lighting improvements.
Look at your garage and outbuildings separately. Detached garages, sheds, and workshops often contain valuable tools and equipment but get overlooked in security planning. If you have a breezeway or covered walkway connecting structures, check whether someone could access your main house through these protected areas without being visible.
Mark high-value targets
Inside your property, note where you keep expensive electronics, jewelry, firearms, and important documents. Most burglars spend less than ten minutes inside, targeting bedrooms and home offices where valuables concentrate. If you run a business from home, your equipment and inventory need dedicated coverage beyond standard residential security.
Commercial properties require mapping cash handling areas, inventory storage, server rooms, and employee-only zones. Retail spaces need coverage of both customer areas and back-of-house sections. Offices with after-hours access need to track who enters and when.
Create your risk assessment template
Document your findings in a simple format you can reference when comparing systems:
Entry Points:
- Front door: [condition, lock type, visibility from street]
- Back door: [condition, lock type, adjacent cover/hiding spots]
- Windows: [count by floor, accessibility, lock condition]
- Garage: [manual/automatic, condition, connection to main house]
Vulnerable Areas:
- Blind spots: [location, reason, possible solutions]
- Unlit areas: [location, distance from entry points]
- Neighbor visibility: [which sides visible, which hidden]
High-Value Items:
- Primary bedroom: [jewelry, cash, firearms]
- Home office: [electronics, documents]
- Garage/shop: [tools, vehicles, equipment]
This checklist gives you concrete data when comparing security systems. You'll know exactly how many door sensors you need, where cameras should point, and which areas require motion detection.
Step 2. Decide on professional vs self-monitoring
Monitoring determines who responds when your security system triggers an alert. This decision shapes your monthly costs, response time during emergencies, and daily involvement in managing security events. Professional monitoring means a 24/7 call center receives your alarms and contacts police, fire, or medical services on your behalf. Self-monitoring means you get the alerts directly on your phone and decide whether to call authorities yourself.
What professional monitoring includes
Professional monitoring connects your system to a certified monitoring station staffed around the clock. When a sensor trips or a camera detects motion, the station receives the alert within seconds. An operator reviews the signal, attempts to contact you through your designated phone numbers, and dispatches emergency services if needed or if they can't reach you.
Most professional monitoring includes cellular backup that keeps your system connected even if your internet or power goes out. The monitoring fee covers this redundancy plus access to operators trained in emergency protocols. Stations typically verify alarms before dispatching police, which reduces false alarm fines that many municipalities charge for unverified calls.
Professional monitoring removes the burden of being your own first responder and ensures someone always acts on alerts, even if you're asleep, traveling, or unable to check your phone.
Monthly costs for professional monitoring run $15 to $60 depending on the service level and features included. Basic plans cover intrusion alarms. Premium plans add fire and carbon monoxide monitoring, video verification, and smart home integration.
When self-monitoring works better
Self-monitoring means alerts go straight to your smartphone through an app. You review the notification, check any associated camera footage, and decide whether to call 911 or ignore it. This approach costs nothing beyond your base internet service, making it attractive if you're budget-conscious and comfortable managing your own security.
You need reliable smartphone access and the discipline to respond quickly when alerts arrive. If you work in environments where you can't check your phone for hours, or you travel to areas with poor cellular coverage, self-monitoring creates gaps. Families with elderly members or medical conditions also face higher risk if alerts go unnoticed during emergencies.
Self-monitoring works well for rental properties where landlords want visibility into access and activity without paying monthly fees for vacant units. Small businesses with owners who actively monitor operations throughout the day can also handle self-monitoring effectively.
Decision framework for your situation
Use this template to evaluate which monitoring type fits when learning how to choose a home security system:
Choose professional monitoring if:
- You want police/fire dispatch without calling yourself
- Your property sits empty for extended periods (vacation homes, rentals between tenants)
- You need insurance discounts (many carriers require professional monitoring)
- Family members include children, elderly, or those with medical conditions
- Your schedule or work environment limits phone access
Choose self-monitoring if:
- You're present or available to respond quickly to all alerts
- Budget constraints make monthly fees unsustainable
- You want full control over when authorities get contacted
- False alarms would result in fines you want to avoid
- Your primary concern is package theft or minor property issues rather than break-ins
Step 3. Choose DIY or professional installation
Installation method affects your upfront costs, system reliability, and warranty coverage. DIY systems let you install sensors and cameras yourself using adhesive strips, basic tools, and smartphone apps for setup. Professional installation means trained technicians run wiring, mount equipment, test signals, and integrate everything before they leave. This choice intersects with your monitoring decision because most professionally monitored systems require or strongly recommend professional installation, while self-monitored systems typically lean DIY.
What DIY installation really means
DIY security systems ship with wireless sensors, cameras, and a base station you configure through a mobile app. You stick door and window sensors where you want them, mount cameras on walls or surfaces using included brackets, and plug the hub into your router. Setup walks you through naming devices, setting alert rules, and testing each component.
This approach works well for apartments and rentals where you can't drill holes or run wires through walls. Wireless equipment leaves minimal damage when you move, and most systems let you take everything with you. You control the timeline completely since there's no scheduling around installer availability.
DIY installation saves hundreds on labor costs but requires you to troubleshoot connection issues, optimal camera placement, and signal strength problems yourself.
The tradeoff comes in reliability and optimization. You might mount a camera with a blind spot that professionals would catch. Wireless sensors depend on battery life and signal strength you need to monitor. If your home has metal siding, thick walls, or long distances between sensors and the hub, you'll discover range problems after installation rather than before.
Professional installation advantages
Professional installers assess your property during a site visit before equipment arrives. They identify the best mounting locations for cameras to eliminate blind spots, place sensors where they'll actually detect intrusions, and run wiring that protects against tampering. The work includes drilling through walls, fishing wires through attics, and mounting equipment permanently.
You get systems that combine wired and wireless components based on what works best for each location. Wired cameras never need battery changes and can't get jammed or disconnected like wireless models. Installers test every sensor, verify camera views, program automation rules, and train you on the system before leaving.
Installation costs run $100 to $500 for basic systems and more for complex setups with multiple cameras and smart home integration. This expense buys expertise that prevents false alarms, ensures full coverage, and typically includes warranty support that DIY installations don't offer.
Cost comparison and decision framework
Use this breakdown when learning how to choose a home security system based on installation type:
Choose DIY if:
- Your budget limits upfront costs to under $500
- You rent or plan to move within two years
- Your property has straightforward layout with clear sensor locations
- You're comfortable with basic tools and smartphone setup
- You want the system operational immediately without scheduling delays
Choose professional installation if:
- Your property has complex layouts, multiple stories, or large square footage
- You want wired cameras that never need battery maintenance
- Insurance discounts require professional certification
- You lack time or tools to install and troubleshoot yourself
- Long-term reliability matters more than upfront savings
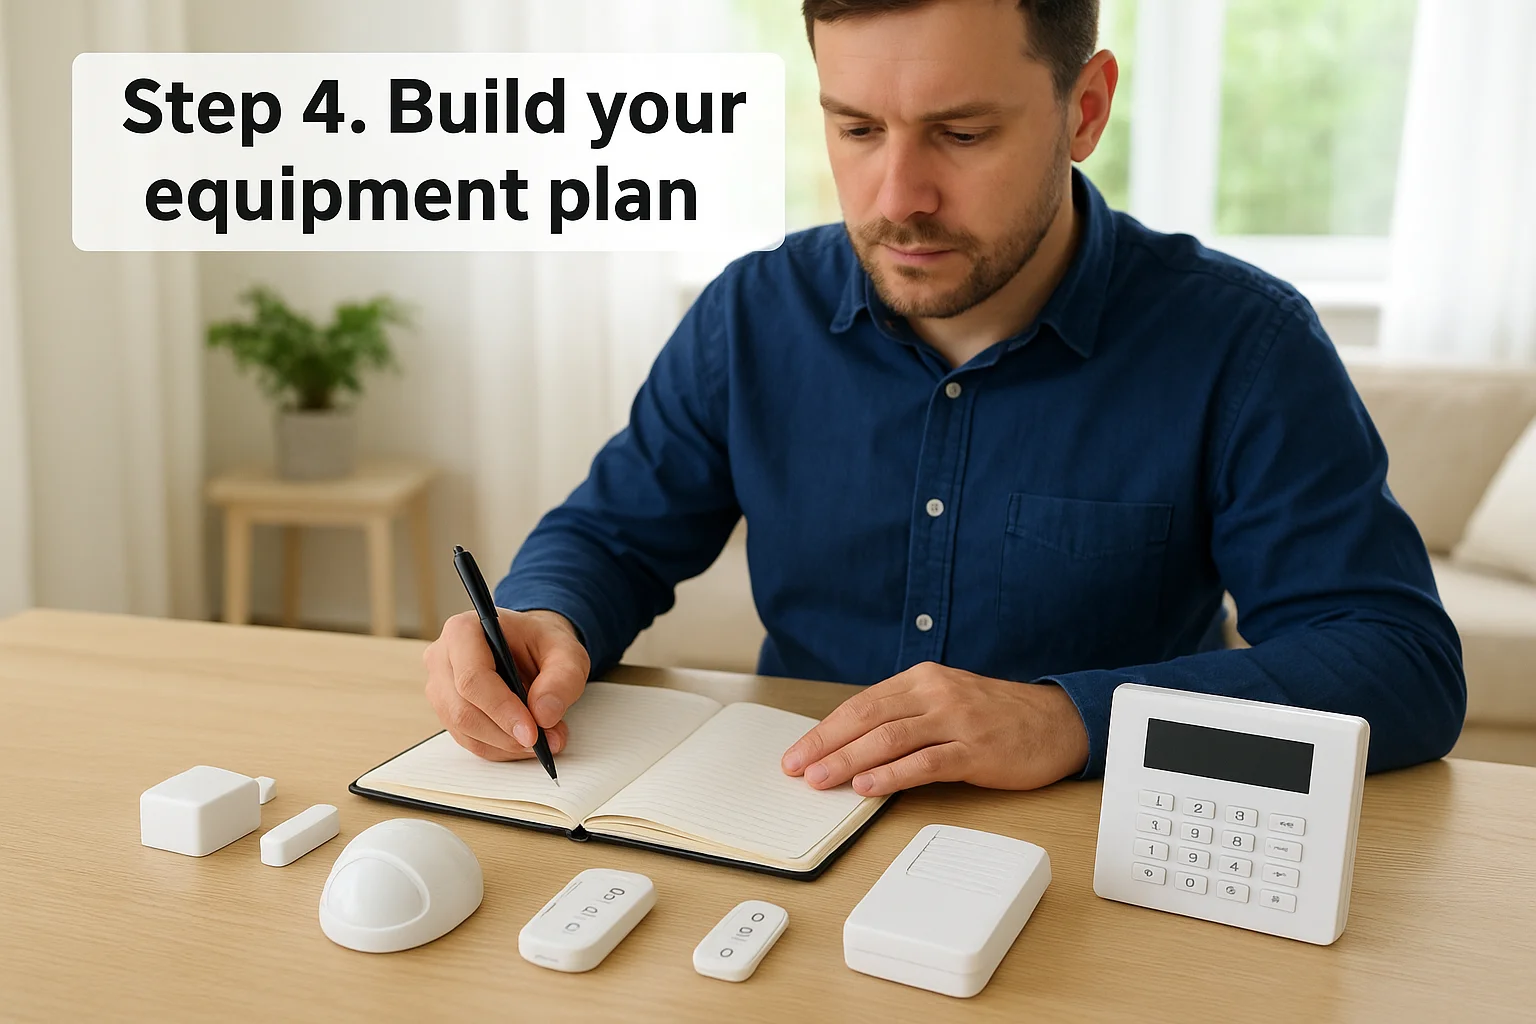
Step 4. Build your equipment plan
Your equipment list translates the vulnerabilities you mapped in Step 1 into specific hardware. This isn't about buying everything available or matching what your neighbor installed. You need the right combination of sensors, cameras, and control devices that cover your actual risk zones without creating gaps or redundant coverage. When learning how to choose a home security system, equipment planning determines both your upfront investment and ongoing maintenance burden.
Core components for every system
Every functional security system needs three foundational elements: detection devices, a control panel or hub, and alert mechanisms. Detection includes door and window sensors that trigger when contacts separate, motion detectors that sense movement through infrared or microwave technology, and glass break sensors that recognize the specific sound frequency of breaking glass.
Your control panel connects all sensors and cameras, processes their signals, and communicates with monitoring services or your smartphone. Modern systems use wireless hubs the size of a paperback book that plug into your router and electrical outlet. Older systems required dedicated landline connections and large metal boxes mounted in closets or basements.
Alert mechanisms vary based on your monitoring choice. Professional monitoring sends signals to call centers through cellular or internet connections. Self-monitored systems push notifications to your phone app and can trigger loud sirens to scare off intruders and alert neighbors.
The minimum viable system includes sensors on all ground-floor entry points, at least one motion detector covering main living areas, and a hub with reliable internet backup.
Calculate your sensor requirements
Use your property walk from Step 1 to count exactly what you need. Start with entry point sensors for every exterior door including garage entries, basement doors, and sliding glass doors. Add window sensors for all ground-floor windows and any second-story windows accessible from porches, roof lines, or nearby trees.
Motion detectors typically cover 500 to 1,000 square feet depending on the model and room layout. Place them in hallways that intruders must cross to reach bedrooms or high-value areas. One detector per floor usually suffices for residential properties under 2,500 square feet.
Glass break sensors cover multiple windows from a central location since they detect sound rather than physical contact. Position them in rooms with large windows or sliding doors where breaking glass provides faster entry than opening locked doors.
Equipment planning template
Document your needs using this framework:
Detection Layer:
- Entry sensors: [count] for doors, [count] for windows
- Motion detectors: [count] by floor level and coverage zone
- Glass break sensors: [count] by room with vulnerable glass
- Environmental sensors: [count] smoke/CO detectors if included
Control and Communication:
- Hub/panel: wireless or wired, cellular backup needed [yes/no]
- Keypads: [count] by entry location for arming/disarming
- Key fobs or cards: [count] for family members
Alert and Response:
- Interior sirens: [count] and placement
- Exterior sirens: [yes/no] and mounting location
- Smartphone app access: [number of users]
This checklist gives you concrete numbers when requesting quotes from providers or shopping DIY systems. You'll avoid under-buying equipment that leaves gaps or over-buying sensors you don't actually need.
Step 5. Choose camera features and storage
Cameras provide visual verification that sensors can't offer, letting you see who triggered an alert and review footage after events. The camera market overwhelms with options from budget models under $50 to professional-grade units over $500, but the right choice depends on where you'll place them and what you need to see. Understanding resolution, field of view, and storage capabilities helps you avoid buying cameras that produce grainy footage or fill up storage before you can review anything useful when learning how to choose a home security system.
Resolution and image quality needs
Video resolution determines whether you can identify faces, read license plates, or just confirm that something moved. Standard 1080p resolution (1920x1080 pixels) works for most residential applications, providing clear footage within 20 feet of the camera. You can distinguish facial features and clothing details at this resolution when lighting conditions cooperate.
Higher resolution like 4K (3840x2160 pixels) becomes valuable for covering large areas like driveways or yards where subjects appear at greater distances. The increased detail lets you zoom into footage during review without losing clarity. Budget the extra storage capacity these cameras require since 4K footage consumes roughly four times the space of 1080p.
Field of view and mounting positions
Camera field of view determines how much area each unit covers. Wide-angle lenses between 110 and 130 degrees capture entire rooms or yard sections but distort objects at the edges. Narrow 60 to 90-degree lenses provide more accurate proportions for identifying people at specific entry points like front doors or garage entries.
Match lens width to mounting distance. A camera mounted 15 feet from your driveway needs a narrower field than one positioned 8 feet from your front door. Most manufacturers publish coverage diagrams showing effective viewing distances and widths at various mounting heights.
Night vision capability matters more than daytime image quality since most break-ins happen after dark when standard cameras capture nothing but darkness.
Infrared LEDs provide black-and-white night vision up to 30 feet for basic models and beyond 100 feet for premium cameras. Color night vision uses ambient light from street lamps or porch lights but requires more illumination to function effectively.
Storage options and capacity planning
Your cameras either save footage to local storage devices like SD cards or network video recorders, or upload to cloud storage managed by your security provider. Local storage requires no monthly fees but limits access to footage when you're away from home. Cloud storage costs $3 to $15 per camera monthly depending on retention period and video quality.
Calculate storage needs based on camera count, resolution, and recording triggers. Continuous recording fills storage fastest. Motion-triggered recording extends capacity significantly but might miss events during the pre-motion buffer period.
Storage capacity template:
- Cameras: [count] × [resolution]
- Recording mode: continuous or motion-triggered
- Retention goal: [days/weeks]
- Estimated storage: [GB per day] × [retention days]
- Storage location: local [device type] or cloud [provider name]
Budget for at least 14 days of retention to ensure you can review footage even if you miss initial alerts or travel without checking cameras daily.
Step 6. Protect against outages and tampering
Your security system only protects you when it's actually working. Criminals understand that cutting power or internet connections disables most home security setups within seconds, which is why sophisticated break-ins often start with severing these lifelines before approaching entry points. Power outages from storms create similar vulnerabilities, leaving your property unmonitored during the exact moments when emergency services get overwhelmed. When learning how to choose a home security system, building in redundancy against these failure points separates real protection from false confidence.

Power backup options
Battery backup keeps your system operational when power cuts out, whether from weather, equipment failure, or deliberate tampering. Most wireless security hubs include built-in batteries that provide 24 hours of standby power, though active alarm conditions drain them faster. Check the backup capacity before buying since cheaper systems sometimes offer only 4 to 8 hours.
Individual sensors powered by replaceable batteries already have inherent backup, but wired cameras and keypads connected to wall outlets go dark immediately during outages. You need either cameras with integrated battery backup or an uninterruptible power supply (UPS) for critical components. A basic UPS unit costs $50 to $150 and supports multiple cameras and networking equipment simultaneously.
Your backup power capacity should match the longest typical outage duration in your area, plus a safety margin of at least 50 percent for unexpected extensions.
Calculate total runtime by dividing battery capacity (measured in watt-hours) by your system's power consumption. A 500-watt-hour UPS powering equipment that draws 50 watts provides roughly 10 hours of operation.
Backup planning checklist:
- Hub backup: [built-in battery hours]
- Camera backup: [UPS capacity] for [number] wired cameras
- Keypad backup: batteries or UPS connection
- Router backup: UPS required for internet connection
- Expected runtime: [hours] based on total power draw
Communication redundancy
Internet outages break the link between your system and monitoring stations or your smartphone. Cellular backup provides a secondary communication path using mobile networks instead of your home internet. Most professional monitoring systems include cellular modules as standard equipment or affordable add-ons, while DIY systems often skip this feature to reduce costs.
Dual-path communication means your system tries internet first, then switches to cellular if the connection drops. This happens automatically without requiring manual intervention. Monthly cellular service typically costs $5 to $10 when bundled with professional monitoring.
Physical security measures
Tamper sensors detect when someone tries to open equipment housings or remove devices from walls. These triggers send immediate alerts before an intruder disables the system completely. Install your main control hub in a locked closet or hidden location rather than near your front entry where visitors can see it.
Outdoor cameras need vandal-resistant housings if mounted within reach. Metal enclosures with security screws prevent removal without special tools. Position junction boxes and wiring inside walls or conduit so cutting connections requires significant effort and time that increases detection risk.
Equipment placement matters as much as the hardware itself. A control panel mounted in your garage becomes accessible the moment someone breaks in through that entry point. Moving it deeper into your home creates layers of detection that trigger before tampering becomes possible.
Step 7. Understand total cost and contracts
Security system pricing hides complexity behind attractive monthly rates and "free" installation offers. The real expense extends far beyond the advertised $15 per month monitoring when you factor in equipment purchases, installation labor, contract penalties, and maintenance costs over years of ownership. When learning how to choose a home security system, you need to calculate total cost of ownership across at least three years since most contracts lock you in for that duration anyway.
Break down upfront versus ongoing costs
Equipment costs vary dramatically between DIY and professional systems. Basic DIY starter kits with a hub, keypad, and five sensors run $150 to $300 from retailers. Adding cameras pushes costs up another $100 to $400 per camera depending on resolution and features. Professional systems often bundle equipment into monthly contracts, either including hardware "free" with higher monitoring rates or requiring upfront purchases between $500 and $2,000 for comprehensive coverage.
Installation adds $100 to $500 for professional labor on straightforward residential setups. Complex installations with multiple cameras, extensive wiring, or smart home integration can exceed $1,000. DIY systems eliminate this cost but require your time for mounting, configuration, and troubleshooting.
Monthly monitoring fees range from $0 for self-monitored systems to $60+ for premium professional monitoring with video verification and smart home features. Mid-tier professional monitoring typically costs $25 to $40 per month. Cloud camera storage adds separate fees of $3 to $15 per camera monthly, which compounds quickly if you're covering multiple angles.
The three-year cost comparison reveals whether paying zero monthly fees with higher upfront DIY costs saves money versus financed professional systems with lower initial payments.
Calculate your total three-year ownership using this template:
Year 1:
- Equipment: $[amount]
- Installation: $[amount]
- Monitoring: $[monthly rate] × 12 = $[annual]
- Cloud storage: $[per camera] × [cameras] × 12 = $[annual]
Years 2-3:
- Monitoring: $[annual] × 2
- Cloud storage: $[annual] × 2
- Equipment additions/replacements: $[estimated]
Three-year total: $[sum]
Contract terms and commitments
Most professional monitoring requires 36-month contracts with automatic renewal unless you cancel within a specific window, usually 30 to 60 days before expiration. Early termination fees equal the remaining monthly payments, meaning canceling after year one costs roughly $500 to $800 in penalties on a $25 per month plan.
Contract fine print specifies who owns the equipment. Some providers lease hardware that you must return upon cancellation. Others sell equipment upfront but disable features if you stop paying for monitoring. Read the ownership clause before signing to understand whether you can switch to self-monitoring or different providers later without replacing everything.
Hidden fees to watch for
False alarm fines hit your wallet when police respond to unverified alarms. Many municipalities charge $50 to $150 per false dispatch after allowing one or two free incidents annually. Professional monitoring with alarm verification reduces this risk but doesn't eliminate it entirely if you accidentally trigger sensors.
Service call fees apply when technicians come out for repairs, battery replacements, or equipment issues outside the warranty period. Expect $75 to $150 per visit plus parts. Warranty coverage typically lasts one to three years on equipment, after which you pay for everything.
Equipment upgrade costs matter for systems that don't support newer cameras or sensors as technology advances. If your hub can't integrate the latest smart locks or doorbell cameras, you face either replacing the entire system or living with outdated capabilities.
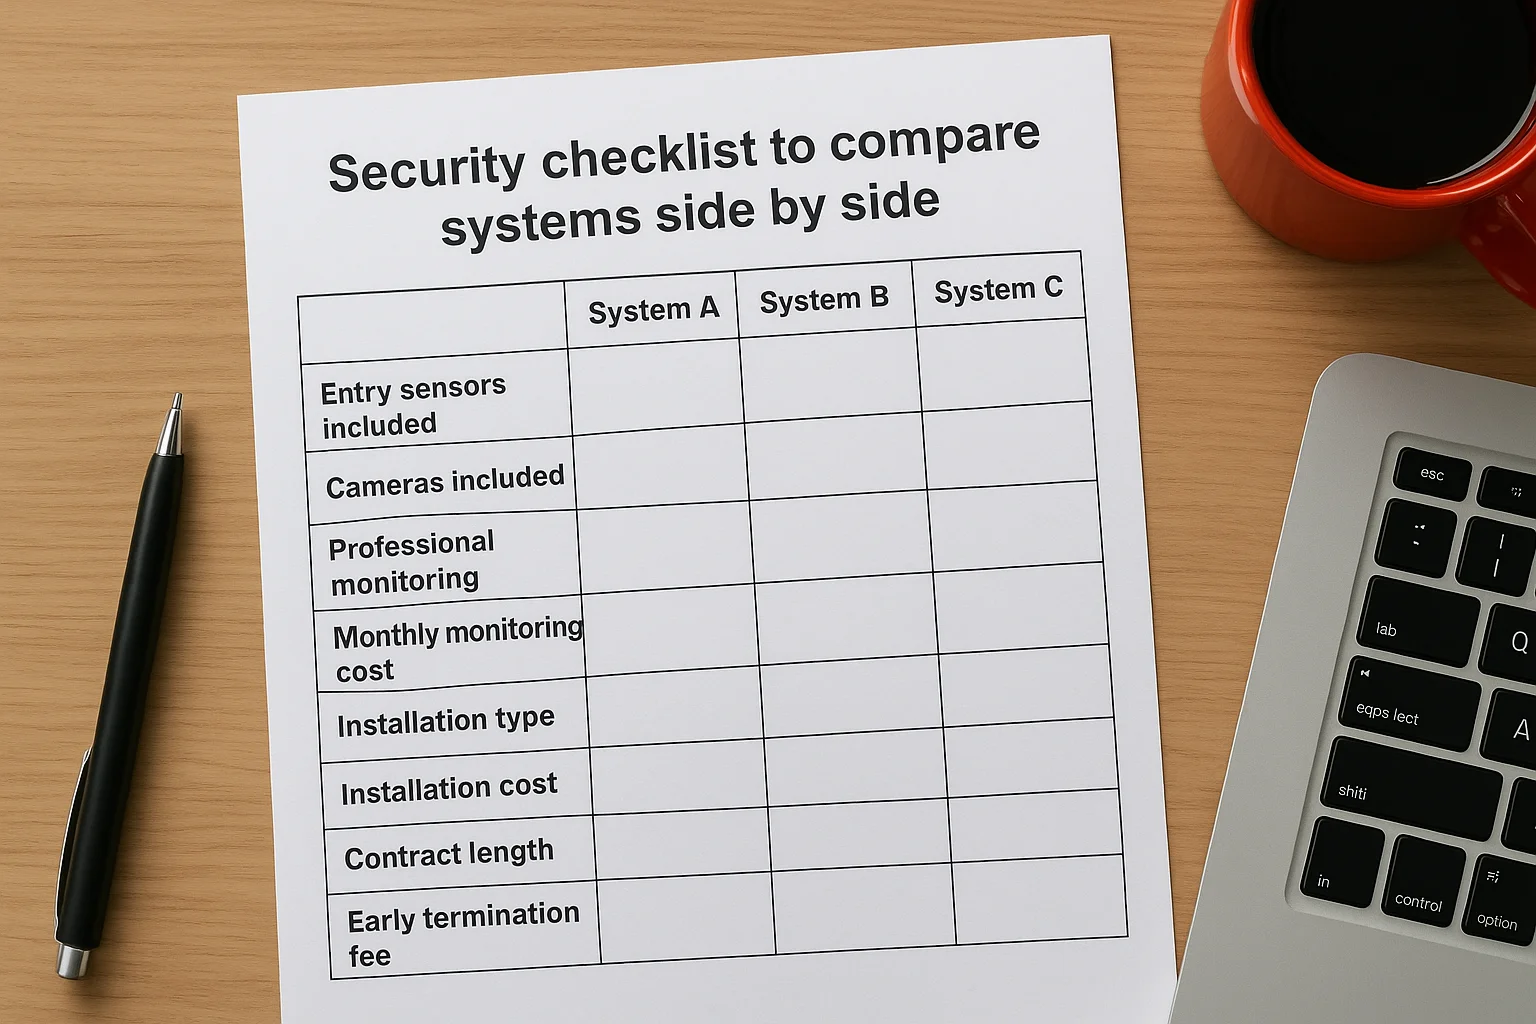
Security checklist to compare systems side by side
A comparison checklist removes the confusion when you're evaluating three or four different systems and trying to remember which provider offered what features. You need a standardized framework that puts identical evaluation criteria in front of every option, whether you're comparing Ring against SimpliSafe, ADT against a local installer, or DIY versus professional setups. Create a simple spreadsheet or table that captures the factors you identified in previous steps so you can see differences at a glance.
Create your comparison spreadsheet
Set up a basic spreadsheet with systems across the top as column headers and evaluation criteria down the left side as rows. This structure lets you fill in specifics for each provider and spot gaps or advantages immediately. Your criteria should include equipment needs, monitoring type, installation method, contract terms, and total costs.
Use this template structure:
| Criteria | System A | System B | System C |
|---|---|---|---|
| Entry sensors included | [number] | [number] | [number] |
| Cameras included | [number] | [number] | [number] |
| Professional monitoring | Yes/No | Yes/No | Yes/No |
| Monthly monitoring cost | $[amount] | $[amount] | $[amount] |
| Installation type | DIY/Professional | DIY/Professional | DIY/Professional |
| Installation cost | $[amount] | $[amount] | $[amount] |
| Contract length | [months] | [months] | [months] |
| Early termination fee | $[amount] | $[amount] | $[amount] |
| Cellular backup | Yes/No | Yes/No | Yes/No |
| Battery backup hours | [hours] | [hours] | [hours] |
| Cloud storage cost | $[amount] | $[amount] | $[amount] |
| Equipment warranty | [years] | [years] | [years] |
Evaluate equipment coverage
List the exact sensor counts each system provides in its base package and what additional equipment costs to add. Some providers advertise low monthly rates but include only three sensors when you need fifteen to cover your property properly. Others bundle comprehensive coverage but charge higher upfront fees.
Check whether each system supports the camera resolution and features you identified in Step 5. A system that maxes out at 1080p cameras won't work if you need 4K coverage for long driveway monitoring. Note which providers let you mix and match equipment brands versus locking you into their proprietary hardware.
Compare monitoring and response
Document whether each system offers professional monitoring, self-monitoring, or both options. Some providers force you into professional monitoring with multi-year contracts, while others let you switch between modes monthly. Note the monitoring center's response protocols for verified versus unverified alarms.
Systems with video verification send footage to monitoring operators during alarms, reducing false dispatch fees and improving police response priority over audio-only alerts.
Verify that cellular backup and battery protection come standard or cost extra. These features make the difference between a system that protects you during outages and one that goes dark exactly when you need it most.
Calculate true cost per year
Add up Year 1 total costs including equipment, installation, monitoring fees, and cloud storage across all cameras. Then calculate Years 2 and 3 by adding only the recurring monthly charges. Divide your three-year total by three to get an accurate annual ownership cost for each system.
Factor in contract penalties if you think you might move or cancel within three years. A system with no contract might cost more monthly but saves you $500+ in termination fees if circumstances change. Include the replacement cost for battery-powered sensors that need new batteries every one to two years.
This checklist gives you concrete data when learning how to choose a home security system instead of relying on marketing claims or salesperson assurances about what's "best."
Next steps
You now have a complete framework for evaluating security systems based on your property's vulnerabilities, your monitoring preferences, and your budget constraints. The checklist in Step 8 gives you comparison criteria to put different providers side by side, and the cost calculations help you see beyond monthly monitoring rates to true ownership expenses. When learning how to choose a home security system, most people focus on equipment and miss the contract terms, backup systems, and installation quality that determine whether their investment actually protects them.
Start by requesting quotes from three providers using your documented equipment needs and risk assessment. Ask specific questions about cellular backup, battery runtime, and contract penalties. Review their responses against your comparison spreadsheet to identify which system matches your requirements without forcing you to pay for features you won't use.
Professional guidance helps when your property has complex layouts, multiple entry points, or integration needs that go beyond basic sensors. Contact our team for a security assessment that maps coverage to your actual vulnerabilities.